Platina API 8.0.0
Since Standard API 8.0.0, API now uses secure Authentication and Authorization based on Microsoft Entra ID (Azure AD). This ensures only permitted users and applications can access your data.
To setup Authentication and Authorization:
Step 1: Register the API in Azure AD
1. Open Microsoft Entra Admin Center
- Go to Microsoft Entra.
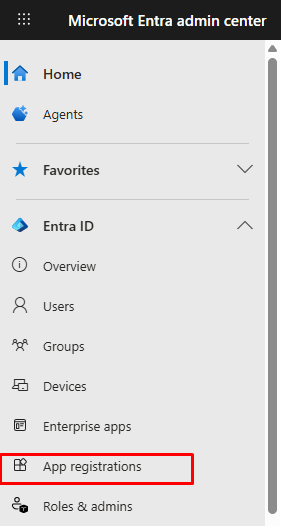
2. Navigate to App Registrations
- Select Azure Active Directory > App registrations.
3. Create a New Registration
- Click New registration.

4. Enter Application Details
- Name: e.g.,
Platina API - Supported account types: Choose as needed for your organization.
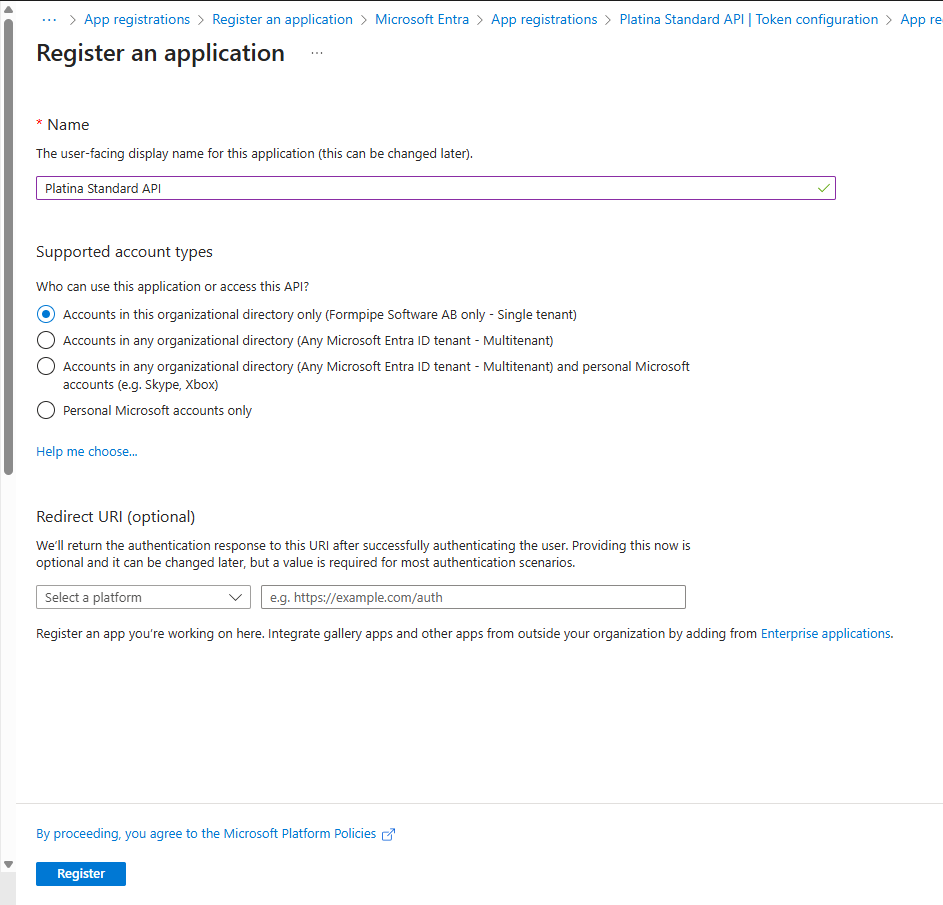
5. Set Redirect URIs
- Add the redirect URI for your application (e.g.,
https://localhost/signin-oidcor your production callback URL).
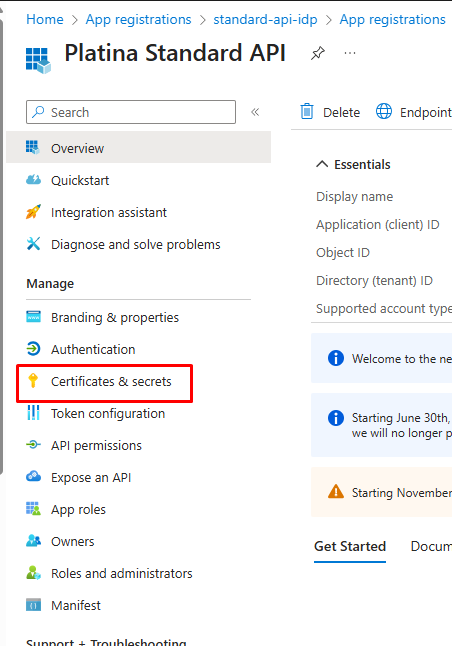
6. Create a Client Secret
- Go to Certificates & secrets > New client secret.
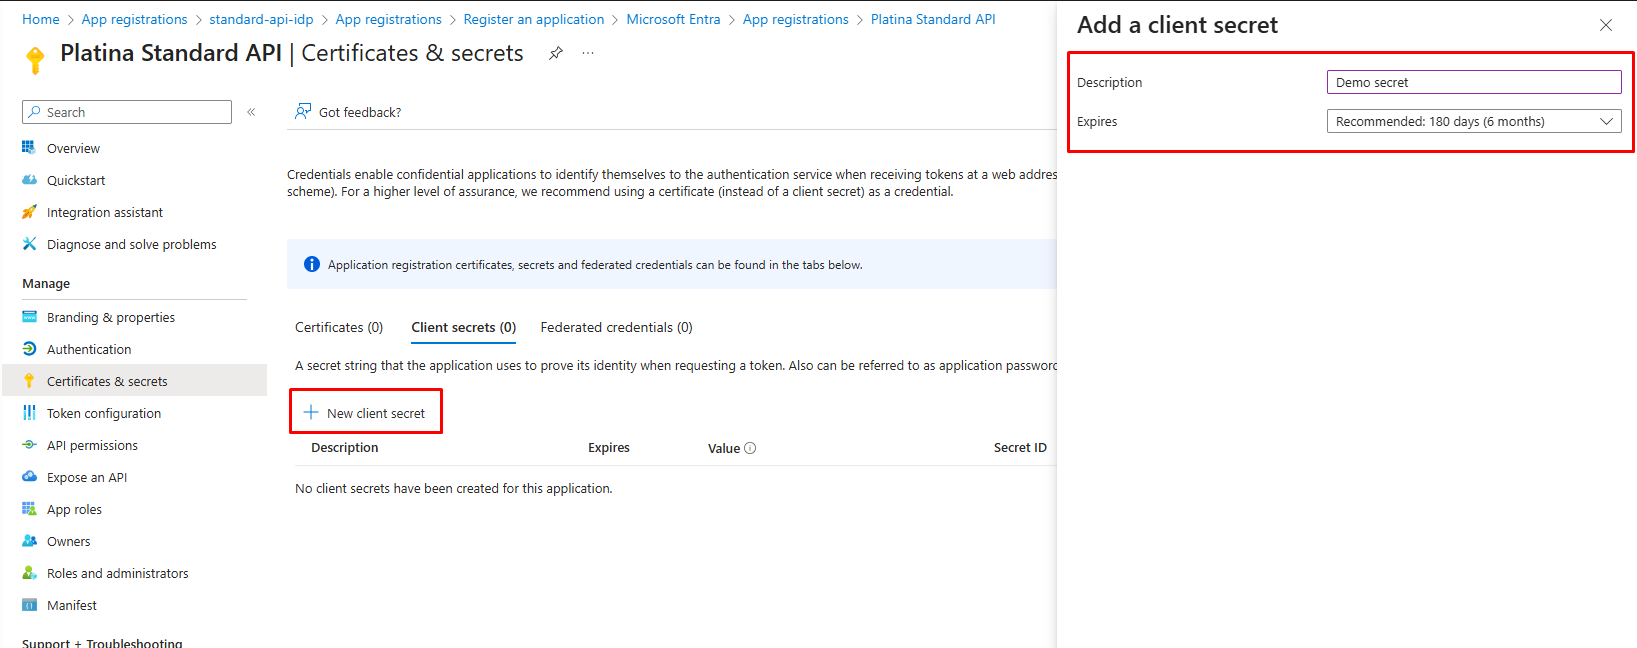

- Important: Save the client secret value immediately. You cannot view it again after leaving the page.
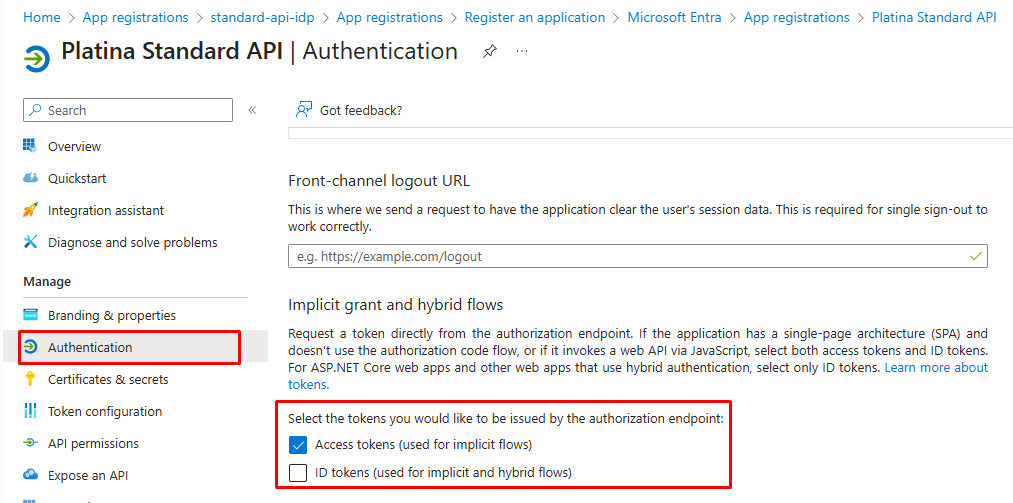
7. Configure Token Settings (Optional)
- In Authentication, select Access tokens if required by your application.
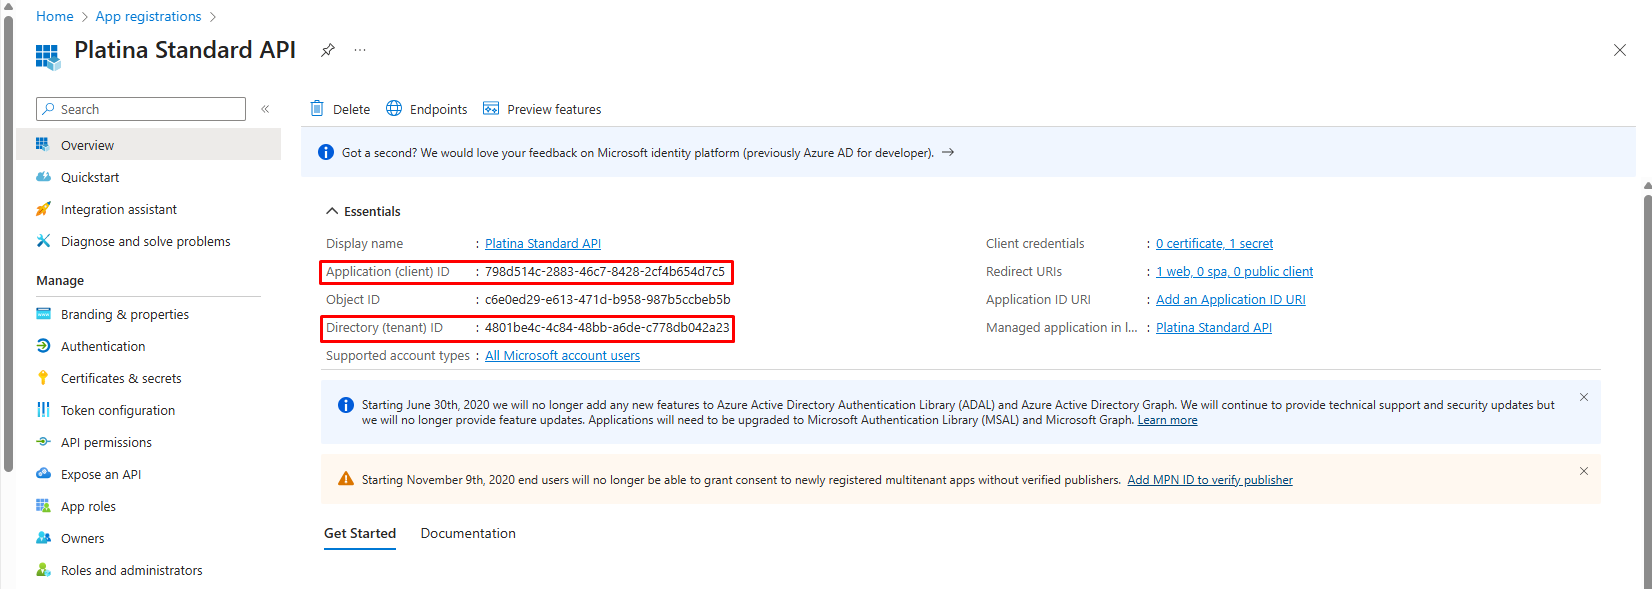
8. Collect Registration Details
- After registration, note the following:
- Client ID
- Tenant ID
- Client Secret (value)
Step 2: Update API Configuration
Edit appsettings.json in the API installation directory:
"AppRegistration": {
  "ClientId": "<your-client-id>",
  "ClientSecret": "<your-client-secret>",
  "TenantId": "<your-tenant-id>",
  "Authority": "https://sts.windows.net/<your-tenant-id>/"
}